Table Of Contents
Background
An extensively prevalent error within the realm of cryptocurrencies involves sending ERC20 tokens to a contract address. These contracts act akin to gravitational wells, absorbing any tokens directed towards them. Numerous deliberations have arisen regarding potential methods for reclaiming tokens from such contracts (for more information, refer to the References section). However, the consensus across most discussions is that achieving such recovery is virtually implausible.
TokenRecovery
The utility’s purpose is to retrieve ERC20 tokens that have been accidentally sent to a contract address. The program conducts an analysis of the contract, identifying vulnerabilities such as those listed in the SWE registry and others. It then endeavors to exploit one of these weaknesses to return the tokens to their rightful owner.
This software draws heavily from the content presented in the Formal Verification of Smart Contracts: Short Paper. Functioning as a static analyzer, TokenRecovery doesn’t require gas for its search for vulnerabilities, distinguishing it from other tools like fuzzers.
Importantly, the owner of the tokens is only expected to cover the standard transaction fee for the recovery transaction if, and only if, TokenRecovery successfully identifies a method to restore the locked tokens back to their original owner.
Installation
You can download pre-built binaries or build from the source.
binary downloads
TokenRecovery is a command line program. Download the zip file and extract to any folder. The executable is statically linked, no loadable dependancies.
The latest release binaries for Windows and Linux are available here:
source code
Building from source code entails setting up an OCaml development environment. For details: repo.
Usage
The utility accepts two command line options, rpc of the EVM-compatible network and the hash of the transaction by which you sent your tokens to the contract. The transaction contains all the data required by the utility to test token recoverability.
./tokenrecovery --rpc https://rpc.ankr.com/eth --txhash 0x692449a8abf787633185716b75869bd87b7419db17434c4b7d354e1d3a8e562f
A list of RPC public endpoints can be found here or here.
Example
What follows is an example of successful recovery on polygon mumbai testnet.
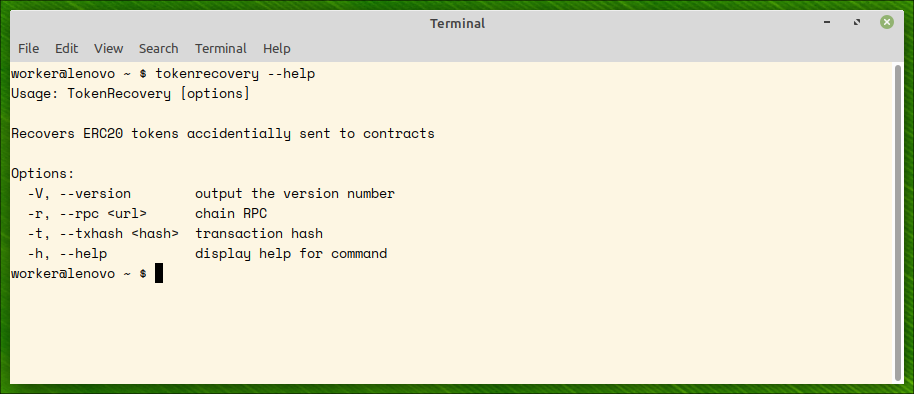
NOTE: To get program help, run
$ tokenrecovery --help
Step 1: contract analysis
We supply polygon mumbai rpc url https://rpc-mumbai.maticvigil.com and transaction hash to the command. The utility analizes the contracts and predicts probability of token recovery from the contract. This can time some time (minutes).
PAY ATTENTION:txhash should be a transaction hash which transferred tokens from your account to the locking contract. TokenRecovery will refuse to proceed if the hash is not a transfer hash. You can always discover this hash by searching in a respective etherscan site (for example, etherscan for Ethereum or poygonscan for Polygon).

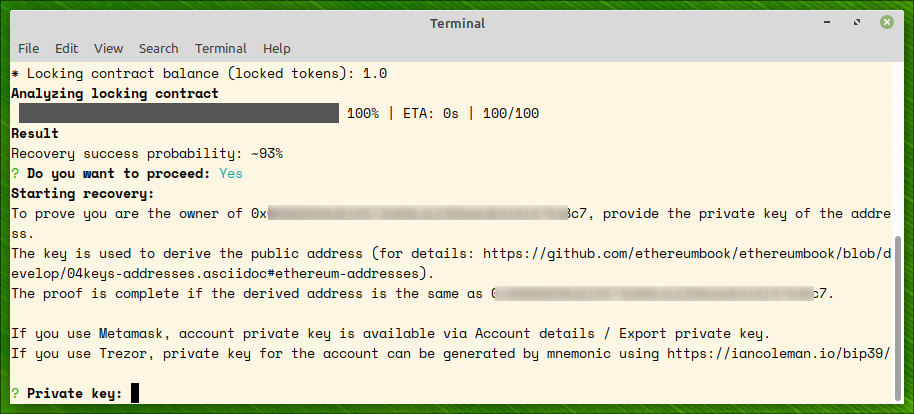
Step 2: proving ownership
To prove the transaction belongs to an account in your ownership, you should provide account’s private key. The key is used for two purposes:
- proving account ownership (and, thereby, ownership of locked tokens)
- sending recovery transactions provided the recovery is possible
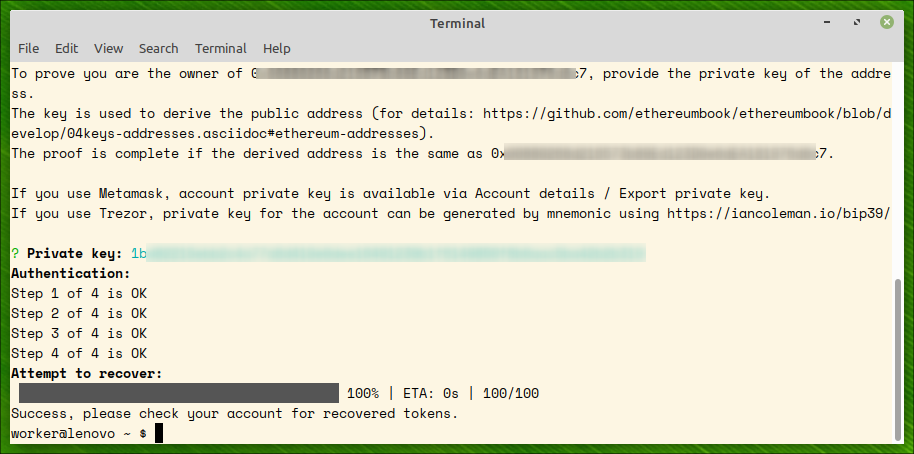
Step 3: recovering tokens
After account’s ownership of the tokens is proved, an attempt to recover the tokens is made. On success, all the locked tokens are recovered to the owner’s account.
Retrieving account private key
Metamask
To get account private key from Metamask, click on three vertical points and Account details:

and then Export private key:

Trezor
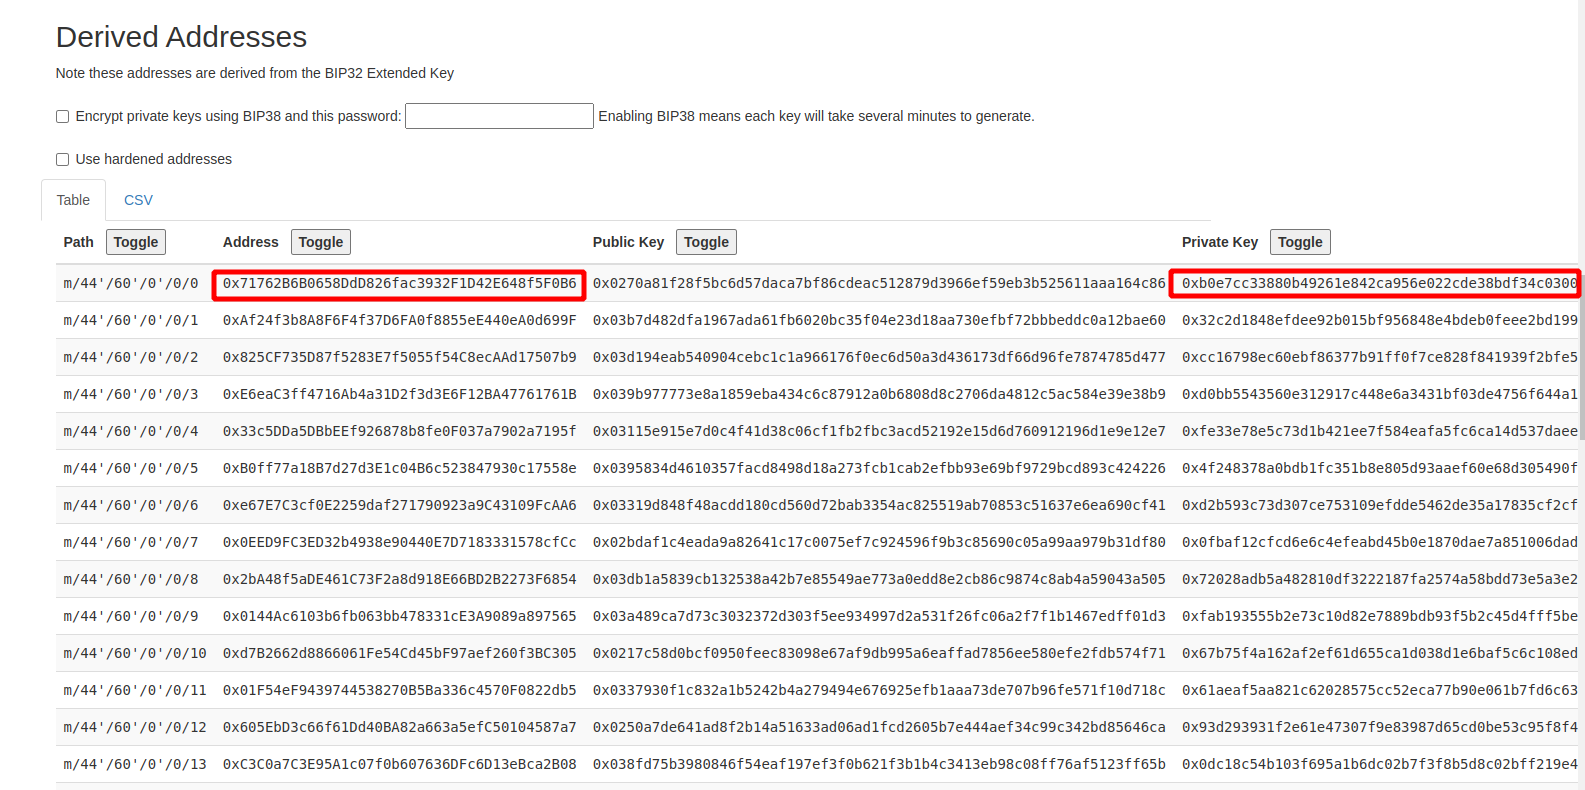
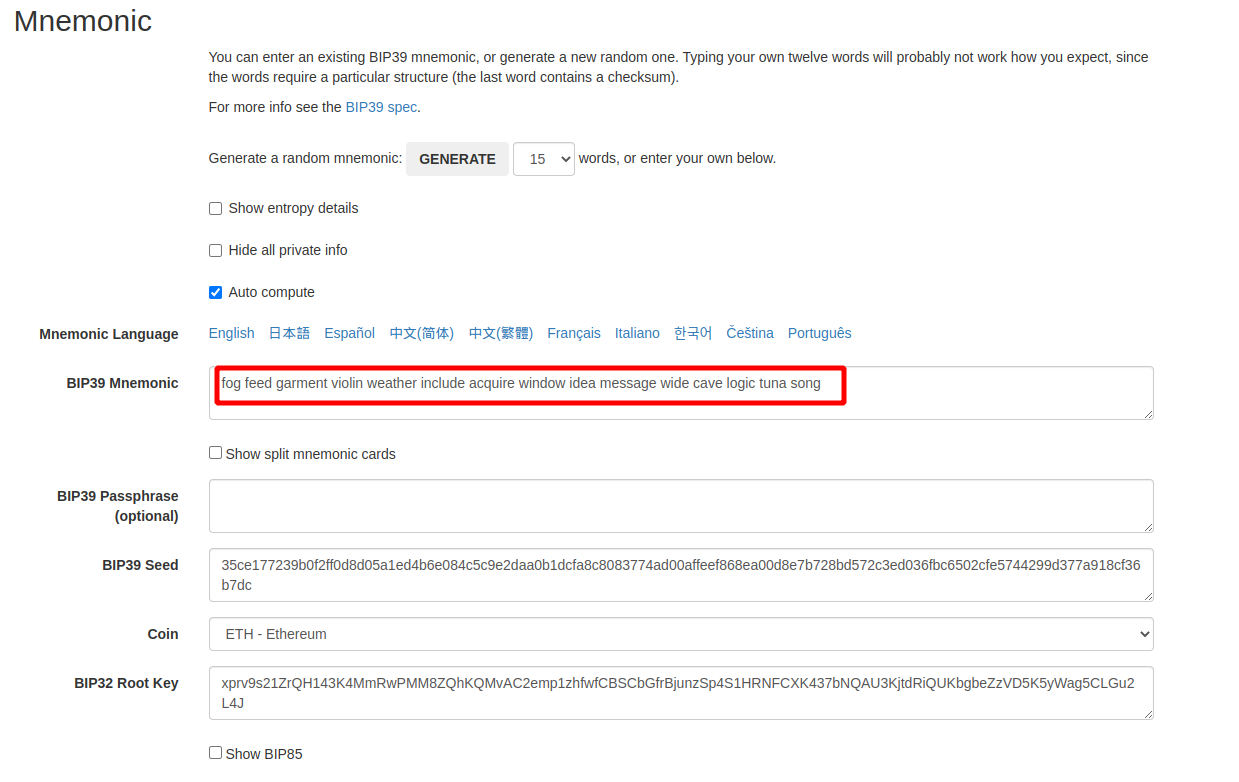
For cold wallets which never export private keys, the only way to get account private key is to use seed phrase to regenerate the private key of the account. There is an online tool for the derivation: https://iancoleman.io/bip39
First, put your seed phrase to BIP39 mnemonic field and chose ETH coin:
Then chose BIP44 derivation path:

The utility will create all the addresses and private keys from the seed. Find your address and respective private key: